TECHNIQUE
Our upward journeys back to air are among the least-considered aspects of diving, but vital to get right and easy to get wrong, says SIMON PRIDMORE.
IN THE PAST I have written about how, in recreational no-deco-stop diving, any planning that is done usually focuses on the “bottom” portion of the dive, and divers tend to switch off once they begin their ascent.
In fact, staying aware and getting your ascent right is the primary factor that ensures a safe and successful dive.
Recently, my wife and I were diving at a site called Black Rock in north Raja Ampat, Indonesia. We were making our ascent up the side of the huge boulder that gives the site its name, when we saw a small group of divers drifting above us, making their safety stop.
There was a current running and, as you might expect, it was catching their exhaled bubbles and pulling them horizontal instead of allowing them to rise naturally to the surface.
Then we noticed that, a few metres beyond the divers and in the direction in which they were drifting, their bubble streams were being tugged downwards!
This was one of the rare instances when I wished I had some sort of radio communication to warn them of what they were heading into.
Sure enough, seconds later, there was chaos as the unsuspecting divers were caught by the downcurrent.
Then they disappeared from our view, behind the mass of the Black Rock.
It turned out, as is often the case, that the downcurrent was localised, like a narrow waterfall in the sea, and it soon spat them all out into calmer water deeper down.
They all eventually surfaced safely, but they had had a huge shock. None of them had seen it coming. They had just been floating there dreaming, waiting to end the dive.
Had they noticed what their bubbles were doing, they could perhaps have swum away to escape from the pull, or simply ascended straight away, calculating correctly that a couple of minutes missed on their safety stop was a much better option than being dragged down for a brief sojourn in the depths at the end of their dive.
Throughout your ascent from any dive, always be aware of anything going on at the surface or above you and around you in the water.
You won’t automatically do this – you have to concentrate, especially after a deeper dive. New experiments have shown that nitrogen narcosis not only affects brain function while divers are at depth, but is still present during the ascent, and even for 30 minutes or so after a diver has surfaced. This might well explain the “switching-off” phenomenon I mentioned before.
Technical divers know that the marker of a successful dive is a safe ascent and decompression, rather than the accomplishment of any specific mission, and the importance of the art of ascending is drummed into all technical-diving candidates throughout their training.
It should really be a key element in diver training at all levels, right from the beginning.
WHERE TO ASCEND

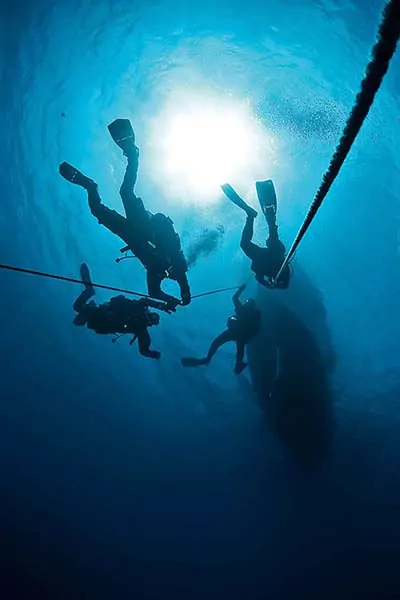
It’s a question of mindset. If you can, always plan to come up from your dive on what technical divers call an “ascent platform”. That means a shotline, anchorline, dive-site marker buoy, reef-wall or the mast of a shipwreck – somewhere that provides a visual depth reference so that you can track your ascent rate more easily.
The ascent platform is not for you to hang onto. You should be able to control your ascent via buoyancy control and concentration although, if you’re still at the beginning of the road to buoyancy nirvana, then something to hold onto from time to time can be very useful.
If it’s a reef wall you’re grabbing, however, make sure to grab a section that is bare rock and devoid of marine life.
In the absence of a reference, if you’re ascending in blue / green / black water, watch your computer closely.
Don’t trust your instincts: there will be times when you don’t even know if you’re going up or down.
Come up slowly. The generally recommended maximum ascent rate is 9m per minute, and slower is better.
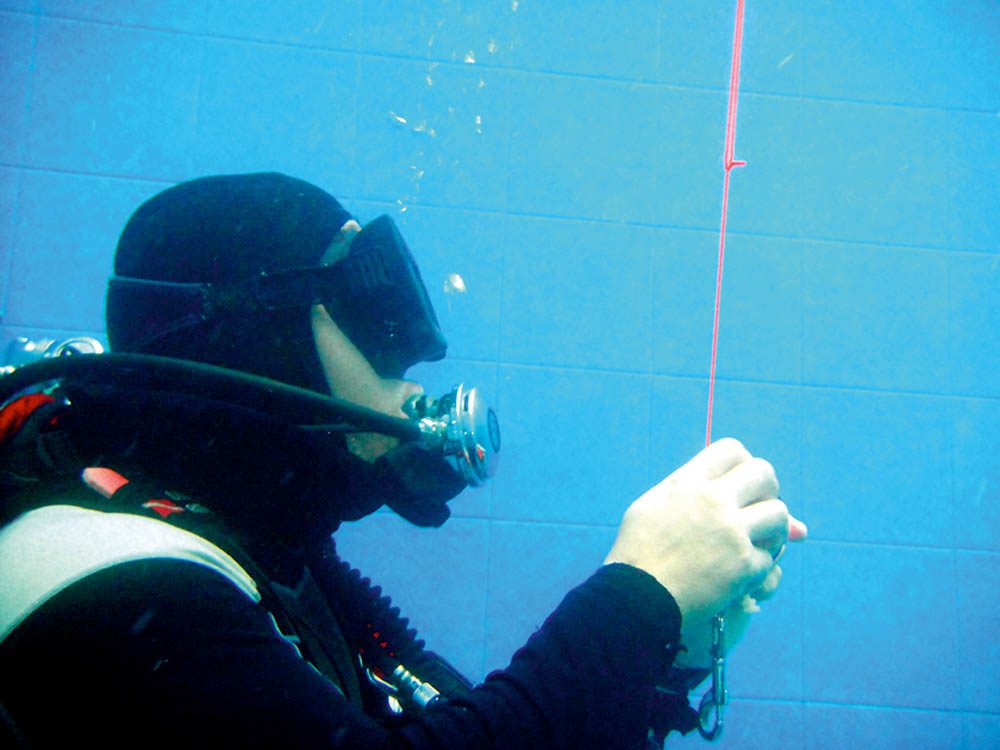
Or, you can create your own ascent platform by sending up an SMB on a line. Make sure you’ve had a lot of practice doing this in a pool or shallow water before you try it on a “serious” dive, because manipulating a reel and SMB under water while maintaining neutral buoyancy is not easy at first.
Before you send the buoy up, always look up to see if there is anything on the surface or in the water above you, other divers perhaps, that the buoy might run into as it goes up.
Then watch it all the way until it’s at the surface with the line tight and vertical.
HOW TO ASCEND
The key words here are anticipation and control. Before you ascend, dump a little air from your BC and, while you’re on the way up, always be aware of the need to dump a little more from time to time.
Do this pro-actively rather than reacting when you feel the expanding air starting to pull you up too fast. Yes, it will mean having to use your fins a little during the ascent, but it means that you, not your BC, are controlling the ascent.
Before surfacing, as long as you have air left and sea conditions don’t make it dangerous to stop (as when drifting towards an area with a downcurrent), you should make a 3-5 min safety stop at a depth between 3m and 6m.
The actual depth doesn’t matter, nor does the exact time you stay there. Pick somewhere comfortable and hang out for a while. If there is a lovely patch of coral on the reef at 4m to gaze at, then that’s where you spend a few minutes.
Or, if you’re on an anchorline and there is a large knot of rope at 6m where a bunch of baby fish have made a temporary home, wait there, enjoying watching them dart about.
When you are ready to surface, up you go – but, not so fast! The main reason you did a safety stop was to help your body decompress more efficiently. However, no matter how long it took, tiny bubbles are still coursing around your body.
Tests show that a diver experiences maximum bubbling 30 minutes after surfacing from a dive. So, even right at the end of the dive, keep the concept of ascending slowly and safely in mind.
This means that you don’t just finish your stop and shoot to the surface through that section of the water column where the pressure difference is greatest. The final part of your ascent is where you need to move even more slowly.
The application of a little maths makes this clear. If your safety stop was at 4.5m and the recommended maximum ascent rate is 9m per minute, it should take you at least 30 seconds to get from your safety stop to the surface.
In practice, try to take at least a minute. Sometimes, this may be difficult to judge, especially as the distance is comparatively short and many computers show only minutes, not minutes and seconds.
So, either count seconds in your head (one elephant, two elephants) or watch two minutes click over on your dive-computer before you pop your head up clear of the surface.
A minute can feel like a long time but, with practice, you’ll get the idea of the right pace to go at.
Take the art of ascending seriously. It’s something that is often neglected but is a technique well worth mastering.
Read more from Simon Pridmore in:
Scuba Confidential – An Insider’s Guide to Becoming a Better Diver
Scuba Professional – Insights into Sport Diver Training & Operations
Scuba Fundamental – Start Diving the Right Way
Scuba Physiological – Think You Know All About Scuba Medicine? Think Again!
All are available on Amazon in a variety of formats.

