PHOTO DIVER
Adventures in Ringflection
HENLEY SPIERS was looking for a new challenge in underwater photography, and his quest began in a hardware store
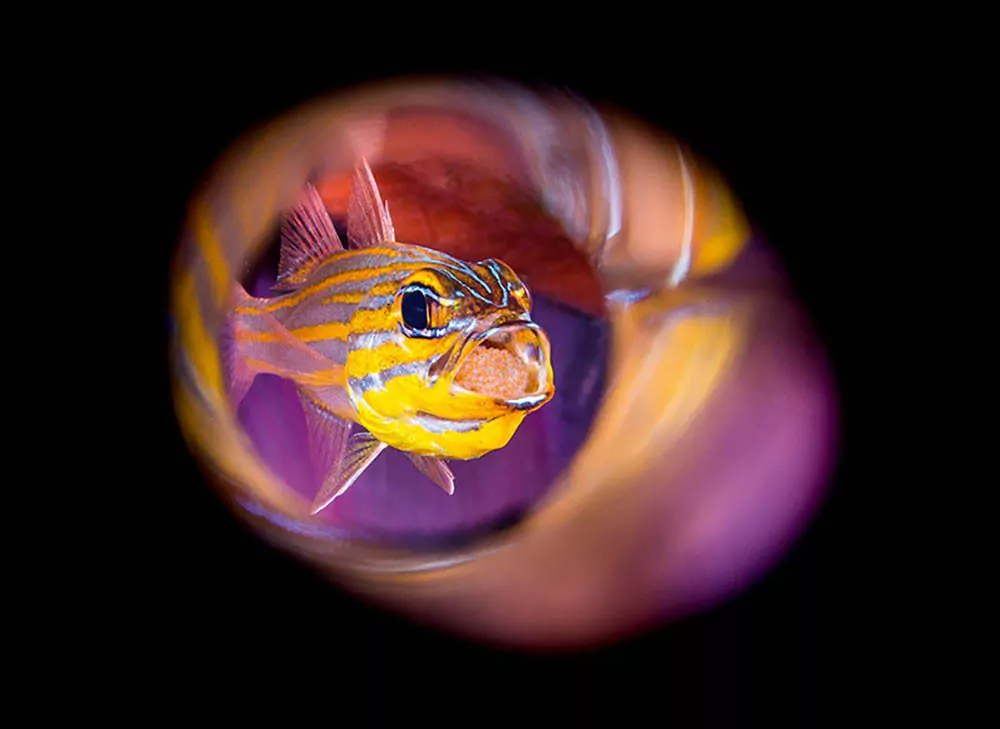
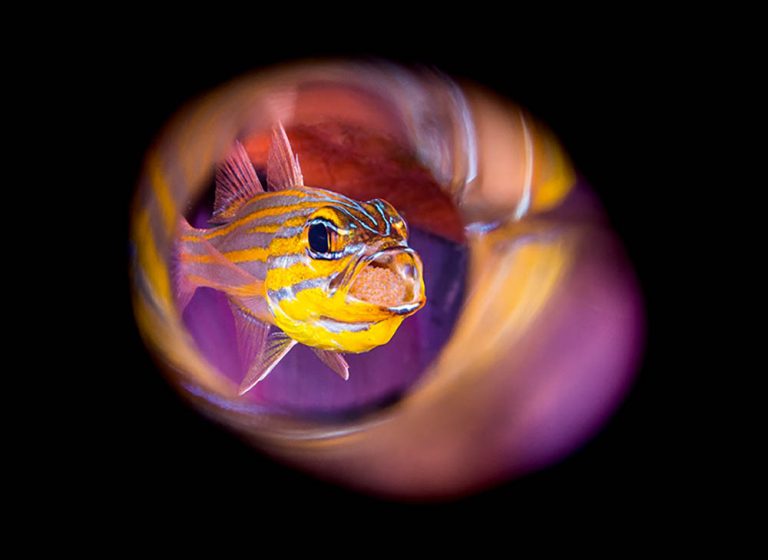
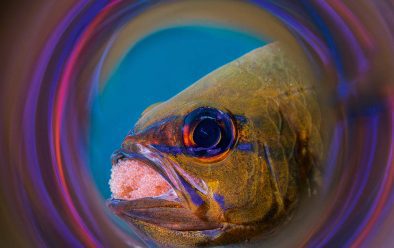
Mouth-brooding cardinalfish against the purple skirt of an anemone.
I STARED at the winning images from 2017’s Underwater Photographer of the Year contest, and Luc Rooman’s Clownfish in a Swirl held my attention the longest.
The subject, a false anemone clownfish opening wide to display a tongue-eating parasite, was interesting, but what really fascinated me was the creamy orange swirl in which it was portrayed. How on Earth was this beautiful photo captured without some Photoshop wizardry?
These days, part of the beauty and the frustration of underwater photography is that it is easier and more accessible than ever. There are more and more good underwater images out there, and finding a way to make yours stand out, particularly if you’re into competitions, is a tough challenge. I was fascinated by the potential of this mystifying technique, and began a quest to incorporate it into my own portfolio.
My friend and esteemed Californian shooter Brook Peterson had started using the technique, and was kind enough to share her findings.
First off, she presented me with a name for it: ringflection.
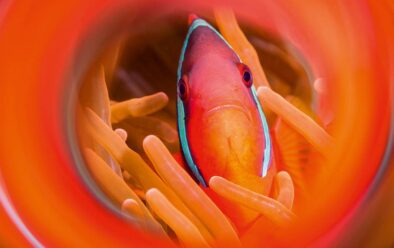
To achieve ringflection, the basic principle is to shoot through a metallic tube. The colours from your subject will then be reflected in the tube and appear as a surrounding swirl. This is just the beginning, however, because different lenses combined with different lengths and diameters of tubes will give you totally different effects.
Brook then put me in touch with Alex Tyrrell, a renowned photographer based in Thailand, and once again I was both surprised and touched by the willingness within our community to share results and ideas.
Brook and Alex both used specially adapted household piping of around 2.5cm diameter as a ringflector. The length of the piping varied from 10-20cm, with a shorter pipe producing a narrower swirl than a longer one.
I enlisted my father-in-law’s help, as he is one of those people who can pretty much build anything, and we headed to the nearest hardware store. We soon gathered a crowd of curious staff-members, as we debated the merits of various pipes in the bathroom section!
Back home we created the first prototype, a narrow tube about 15cm long, held in place on the outside of the camera-lens port using a combination of a diopter flip-holder and lots of duct tape.
The test shots of flowers at home were tremendously promising, displaying a narrow ring of swirl around the subject and then black all around, similar to a circular fish-eye effect.
There was huge excitement in feeling as if we were inventors of some kind, tapping into new territory.
One of the best things about ringflection is that the RAW images, straight out of the camera, look really special. In photography competitions, RAW files are often requested when reaching the final rounds of judging, and I believed that the impressive RAW file was another feather in the cap for this technique.
Appeared in DIVER May 2019
on the first test dive with the ringflector, we found a mouth-brooding cardinalfish sitting in front of a purple anemone skirt.
I have an enduring fascination with mouth-brooders – the lengths marine animals go to protect their young surely puts us humans to shame – and I watched as this father-to-be ensured that all his eggs were well-oxygenated by periodically shuffling them around his mouth.
Although I didn’t fully understand why at the time, this would turn out to be an ideal setting for using the tube. When starting out with the ringflector, I was so excited by the results that I almost viewed it as a magic wand. Every possible subject held a renewed interest as I wondered what it would look like through the tube.
Over time, I would come to realise that the usual rules of underwater photography still apply.
Although the ringflector narrows the field of vision, the colours of the ring will still be recruited from the subject and surroundings, so finding a good background, particularly a colourful one, is of paramount importance.
The ringflector alone will not elevate what would have been a mediocre shot – its ultimate purpose is to add an extra element to an already beautiful scene.
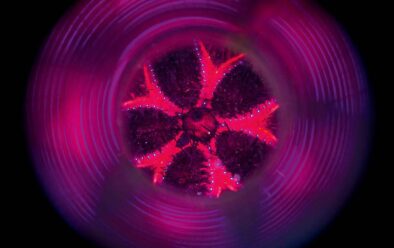
One aspect with which we struggled was keeping the tube straight and centred in the middle of the lens. In the second prototype, we recycled one of the accessories from the bathroom kits to create a round holder into which the tube could be placed and removed.
This meant no more duct tape, which allowed me to keep the tube in a pocket, adding and removing it for shots as necessary.
Even with this modification, I still had to use the system as if firing a rifle under water, with my left hand supporting and adjusting the tube, while the right hand rested on the camera trigger.
One useful tip is to keep the camera focus point in the centre of the viewfinder to ensure that your ringflector is properly aligned. This sounds harder than it is in reality – I was able to keep track of fast-moving subjects and capture behaviour shots without problems and, if you have dabbled with the dark art of snooting, you will find ringflection easier.
Phase two also saw the addition of a second tube. This one, at 4cm, was wider and produced what I call the “Looney Tunes” effect – with the colours from the subject spiralling all the way to the edge of the frame.
With our toolkit of ringflectors refined at home base in Cebu City in the Philippines, we now hit the road for a dive-trip to Malapascua and then Zamboanguita (Dauin’s younger cousin).
A big underwater camera rig on its own is often a conversation-starter on dive-boats, and during this adventure in ringflection, I would often become aware of curious onlookers as we unpacked or used the metal tubes.
On several dives, I would peer up from the viewfinder to find a puzzled diver staring down at the unusual appendage sticking out from my housing. Try as I might, underwater sign language has its limitations, and our exchanges would still leave them scratching their heads.
At least there will have been some interesting conversation fodder for the bar that evening.
My favourite subject from Malapascua turned out to be a highly co-operative cuttlefish at Gato Island.
I find that there are two very clear types of character when it comes to cuttlefish: the extroverted show-offs and the anxiety-ridden introverts.
Luckily for me, this individual was a gregarious type, allowing a close approach and sticking around for as long as our air supply would allow.
Its skin pulsated with red and orange hues, contrasting beautifully with the surrounding blue water. I opted to shoot it with the Looney Tunes tube, and was delighted as the results popped up on my LCD screen. Cephalopods are such other-worldly creatures to begin with that this highly stylised type of image seemed only befitting.
To begin with, I had been mostly using a 60mm macro lens when shooting with the ringflector, but as we moved onto the mucky shores and small subjects of Negros Oriental, I would start to make more use of a 105mm macro lens. Both of these focal lengths are capable of yielding memorable images when used with a ringflector, and it’s worth remaining open-minded.
Remember, however, that the actual ringflector will have a very different look as you move from one lens to another, and you might find that certain tube diameters and lengths work better with one particular lens.
Indeed, half the fun when building and using ringflectors is adjusting your set-up to create a look that you like.
In Zamboanguita the most alluring subjects were a crowd of mouth-brooding cardinalfish on the house reef. Usually, just getting an image of these with their mouth open, at the peak of the action as they shuffle their eggs, is a worthy photographic mission, but I wanted to up the difficulty and capture such an image while shooting through the tube.
With several individuals sporting eggs, all within a one-minute swim from shore, I had the perfect set-up and the main thing required was patience and a quick trigger-finger.
As my experience with the ringflector grew, I became quite accustomed to tracking subjects through the barrel of the tube, and was able to keep up as the cardinals flitted up and down the water column, waiting for that split-second shuffle.
On the technical side, I found that a good amount of light is crucial to getting a nice ringflection effect, so don’t close up your aperture too far, and don’t go all the way to your base ISO.
In fact, one of my favourite uses of this technique was to open up the aperture and shoot subjects against blue water – creating lovely swirls of colour against the blue background.
Your strobe positioning will also have to be fine-tuned, as the tube will block a portion of the light. I found that I had my strobes out a bit further forwards and wider to ensure good illumination of the subject.
Ultimately, my ringflection images didn’t wow judges in photography competitions as much as I had hoped. The end result might be too far from a naturalistic interpretation of the scene, or perhaps the impact of this novel technique was lost after the first few award-winning images.
In any case, I still value the addition of these photos to my portfolio, and had a lot of fun creating them. You can buy dedicated ringflectors now, but I would heartily recommend a trip to the nearest DIY store for original results!
