Mike Bartick offers some sage advice on how to get to grips with the techniques of blur and bokeh
Photographs by Mike Bartick
Bokeh is a highly useful and essential skill for all forms of photography, encompassing light, the mechanics of the lens, and the photographer’s eye for creating strong compositions.
The term bokeh (boh-kuh) is a Japanese word that helps to describe ‘the blur’, both in front of and behind the primary focal point in an image.
The ‘pleasingly aesthetic blur’ is how it is commonly phrased. In actuality, bokeh is a general, blanket-use term that should be divided into two distinct categories – blur and bokeh.
Taking this next step will help you to break down your own images in post more critically, analyze other photographers’ work more clearly and gain more insight on the process.
There is much, much, more to bokeh then just the blur and knowing what to look for and how to make it will help you move from a blurring apprentice to the boss of bokeh.
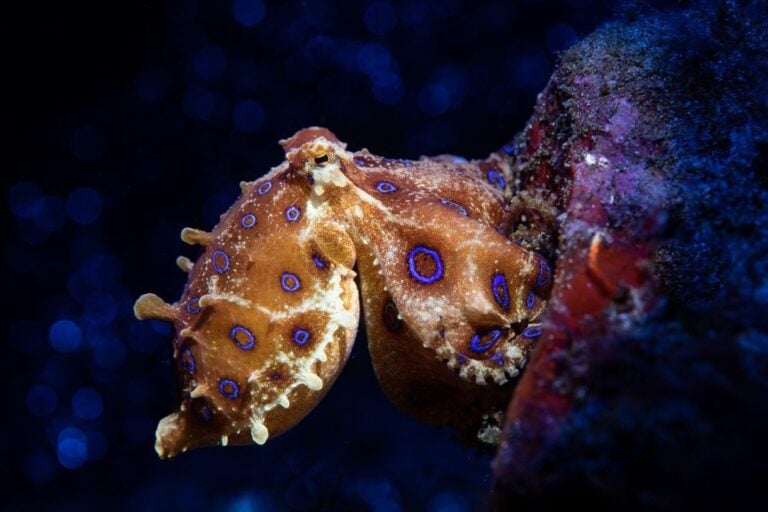
The blur is most commonly used for making portraits when a photographer intentionally blurs the background by opening the lens’ aperture, forcing the main subject to stand out.
This is highly useful when shooting across a featureless substrate or if there are other background elements at play.
Developing this skill is an essential skillset every underwater photographer should understand how to use effectively. Closely examine your images to grade the quality of the blur.
Is it grainy, contrasty, is there distracting bright or dark splotches leading the viewer’s eyes away from the main focal point? When we begin to scrutinize and grade the blur, we will also begin to see a difference and the effects in our depth of field.
Different designs begin emerging in the form of swirls, sometimes hexagonal shapes, curricular dapples, floating and lifting of natural patterns, bubbles and beading, even pastel colors. The design within the blur is the actual bokeh. It only sounds critical, because it is.
Common terms to describe the effects of your aperture are ‘depth of field’ and ‘plane of focus’. Depth of field is the matrix of clarity within the blur from the front of the frame to the back, giving it depth. The plane of focus is the portion that is sharp, frame side to side.
Think of these two control points and imagine a rectangular box that expands and contracts by adjusting the aperture. If your subject is composed front to back, the fall off of sharpness will be seen more dramatically than if your subject is shot side to side.
Composition rules begin to change when shooting at open apertures. We need to pay strict attention to our focal point. Be sure to use single point focus and place the focus pipper directly on your subject’s eye, rhinophore or main point of interest.
When it comes to light, using a higher aperture also deepens shadows, therefore if we open our aperture when photographing subjects like a black frogfish, we also see exposures change without adjusting the strobe power. This is incredibly helpful for everyday muck diving.
Because blur and bokeh are a product of the lens and not the camera, ‘fast lenses’ or prime lenses with an aperture of 2.8 and better, work the best. Using diopters can also play into the bokeh zone, but all lenses are capable of blurring the background to some degree.
The two main factors that affect the blur the most are aperture and distance. Moderately large apertures such as ƒ-13-ƒ-9 are perfect for creating effective blur. To achieve better blur in the background, get close to your subject in the foreground.
The closer you move towards your subject, the more the background is forced to blur. Opening your aperture from ƒ,9 and larger and your image will compress even further and begin forming interesting bokeh.
The path to better bokeh will begin taking form as hexagonal stop signs and as you open your aperture further (ƒ8-ƒ2.8), the edges smooth out and begin to form higher quality well-formed bokeh in the shape of smooth bubbles.
The mechanics of your lens will create the bubbles, if you open your aperture and or decrease your focal range and push past the stop signs.
Aperture guide
While bokeh will occur at any aperture setting, we begin to see it the most using medium to wide aperture ranges. Medium range aperture’s blur and separate the background effectively while wide apertures bring the formation of bubbles.
• Medium wide apertures – ƒ,9-ƒ-13 Moderate depth of field, blur and moderate bokeh that teeters on hexagons and bubbles are both present. Bright macro images are made in this range that effectively separate your subject from the background.
• Wide apertures – ƒ2.8- ƒ8-Very limited depth of field, blurred backgrounds and rounded bokeh bubbles. Natural light pushes to pastels with a compressed appearance and featureless negative space. Balance exposures with a lower ISO.
More on ƒ-stops
The size of the aperture is regarded as an ƒ-stop by how much light is blocked of ‘stopped’ from entering the sensor by the lens. The higher the number equates to more light being stopped, subsequently adding depth of field.

Longer lenses such as 100mm or 105mm macro lenses create better blur and the best bokeh. Although 85mm, 60mm, 40mm even the classic 50mm portrait lenses also create lovely bokeh as long as they are ƒ, 2.8 for better.
TG cameras and other compact cameras are also capable of creating lens blur using the same methods of using an open aperture except the blur is software driven using filters, rather than mechanical. The same rules also apply with distance.
Collectors lenses such as the recently popularized Trioplan or Planar lenses make incredible round bokeh however the old school lenses do not have a CPU that connects your autofocus.
The most-organic method that won’t break the bank is using the lenses you already own and to experiment.

Other methods for gaining bokeh beyond the blur also exist like using a weaker (+5 or +6 magnification) diopter and moderate apertures. Diopters naturally decrease working distance and reduce depth of field, often resulting in interesting beading caused by natural patterns.
Experiment with different compositions, search for interesting backgrounds and keep the frame well lit from front to back while controlling your exposures by balancing with your ISO.

Standard strobe power is still needed to bring the sharpness and to add the warmth to the frame. Many cameras are capable of shooting lower ISO or expanded ISO ranges below 100.
Shooting with open apertures will certainly test your ISO range on the lower side and you will need to become comfortable using your ISO. If your camera will not go below 100, using an ND filter is also an option.

Man-made ‘bling’ is created using similar methods, except here, we introduce a reflective object(s) to the back and/ or foreground. Popular methods of creating this style of bling can incorporate lights, glitter boards or anything reflective.

My favorite is simple steel wool or a brillo pad. The same rules apply to distance, but here you can insert a background where there is none and use colored lights to create interesting colorful bubbles.
This is where hexagons and bubbles really become quite important. If edges are apparent around your bubbles, you will need to get closer to your subject, move the background further away or open your aperture more.


Once this has been accomplished, you will see the edges smooth out into classic shaped bokeh bubbles.
While this can be fun, it’s important to keep the main event the main event, and not to allow the background to overpower your subject, becoming distastefully obnoxious. Think of bokeh bling as a subtle secret ingredient in a recipe.
You want to create a mystery on the pallet, not numb it. Done right, natural bokeh or even man made bokeh will take your image making process to the next level and give you a greater understanding of light, how to control light and the function of your lens.
You’re everyday shooting on the sand will greatly benefit using basic lens blur techniques to help isolate your subject from its background and is an essential skill every budding underwater photographer should grasp.
Passing the blur point and reaching into the realm of stylish bokeh is only a step away and learning these two in tandem will shorten the learning curve exponentially.
Experiment often, have fun and be sure to keep an eye open for that next great set up and soon you will become a master of the blur and the boss of bokeh.
FAQ: Blur and Bokeh in Underwater Photography
Q: What is bokeh in photography?
A: Bokeh refers to the quality of the out-of-focus areas in an image, often seen as pleasingly soft blur or bubble-like highlights that add artistic depth.
Q: How is blur different from bokeh?
A: Blur is simply the defocused background or foreground, while bokeh describes the character of that blur—such as hexagons, bubbles, swirls, or smooth edges created by the lens.
Q: What settings create the best bokeh underwater?
A: Medium-wide apertures (ƒ9–ƒ13) create effective blur with some bokeh, while wide apertures (ƒ2.8–ƒ8) enhance rounded, bubble-like bokeh with limited depth of field.
Q: Do you need special lenses for bokeh underwater?
A: Longer prime lenses (100mm/105mm) and fast lenses with apertures of ƒ2.8 or wider produce the strongest bokeh. Compact TG-style cameras can simulate bokeh with software filters.
Q: How can distance affect blur and bokeh?
A: The closer you are to the subject, the more the background will blur. Increasing the distance between subject and background also enhances bokeh effects.
Q: Can artificial backgrounds be used to create bokeh?
A: Yes. Reflective items like glitter boards, steel wool, or coloured lights can be placed in the background to create man-made bokeh “bling” while keeping focus on the subject.
This article was originally published in Scuba Diver Magazine
Subscribe today with promo code DIVE1 — enjoy 12 months for just £1!